


In most cases in Microsoft excel worksheet, it is necessary
to hide or unhide certain rows or columns so as to make the whole worksheet
compact and readable without scrolling to the right and left or up and down.
For example, if you want to insert chart into a worksheet
and you don’t want certain columns or rows to appear on the chart, it is
necessary to hide and later unhide those columns and rows when you are through
with the chart.
In this tutorial, I will be taken you through the steps of
hiding and unhide rows and columns in Microsoft excel worksheet. So sit back
and follow me along.
Table of Content
- Explanation
- Hide Columns and Rows
- Unhide Columns and Rows
EXPLANATION

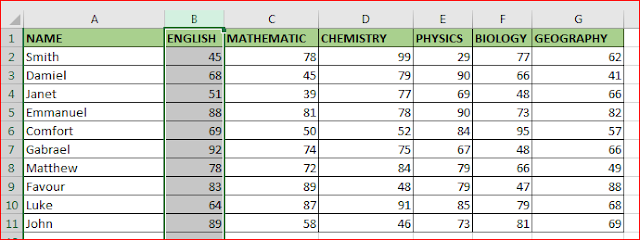
From the above figure, it can be seen that students are
offering six subjects. The first subject is English follow by Mathematics,
Chemistry, Physics, Biology, Geography. what happen if we want to plot a pie
chat of students names against Mathematics scores. The problem here is that
English column is between Name and Mathematics columns, and we need to select
both Name and mathematics columns to insert the pie chart in the worksheet.
The solution to this problem is to hide the middle column (English)
and then select the remaining columns (Name and Mathematics).
Hide Columns or Rows
The following steps below apply to both row and column
Step one:
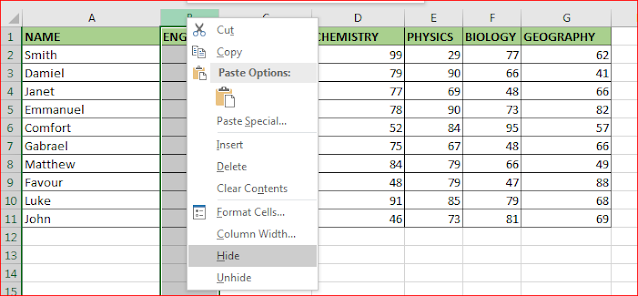
Select the column or row
Click on the heading to select it as shown in the figure
below
Steep two:
Right-click and from the drop down menu, select “Hide”
Outcome

Unhide Column or Row
The following steps below apply to both row and column
Step one:
To unhide a column or row, select the column or row to the
right and left or up and down of the column or row you have already hidden.

Step two:
Right-click and from the drop-down menu that appears, select
unhide.


